I missed the whole netbook revolution. I already owned a full-fledged laptop, and I couldn’t understand why would people pay $300 for an underpowered, space-limited, hardware-crippled machine, when they can get a full laptop for around $500.
But then I read a post about installing OS X Leopard on a Dell Mini 9 and I became intrigued. After reading some more, I found that many people treat their netbooks as platforms for experiments and expansion. I had some spare money, so I decided to get me a Dell Mini and hack at it.
The title of this post comes from the fact that I already own one Mini – a Mac Mini I got 2 years ago.
Hardware
I read a bit (I recommend the MyDellMini forums – so much good information and so many helpful people) and decided to go with a white Dell Mini 9, with:
- 8.9” screen at 1024 x 600 (wide but short)
- Onboard Intel graphics card
- Intel Atom N270 1.6GHz CPU
- 1GB of RAM
- 32GB Solid State Disk
- 1.3M camera
- Ubuntu 8.04 OS.
 All in all, around $350, before sales tax and Arnold’s “green” tax ($8 on any screen bigger than 8” – damn, missed it by 0.9”
  ). I skipped the 2GB and Bluetooth options, as a manual upgrade is quite easy and cheaper – more on that later. in hindsight, I could have given up the 1.3M cam and gone with the 0.3, and probably taken the 512MB memory option – that would have saved a couple of $$$. In the SSD department, it seems like Dell’s margin is smaller, as these disks are still not much cheaper to get on your own.
The machine is quite light (2.4 lbs == 1.1Kg), but sturdy. The form factor allows me to use it on airplanes, without fearing the person in front of me will lower his seat and crush my screen (as happened to my poor T42  ). The keyboard is better than other netbooks’, but some of the keys are weirdly placed – not fun for touch typists.
It has an extremely bright LED screen, that lends itself well to viewing videos in full screen mode. It has 3 USB 2 ports, a VGA port and a multi-card reader - which makes it easier to extend storage. It offers wireless-G card and Ethernet (which, let’s admit, rarely gets used on a laptop) in the connectivity department.
The 4-cell battery lasts ~3 hours (less if you use full brightness, volume and disk usage). I can easily take this netbook with me anywhere. It’s great for casual browsing, emailing and a couple of small games.
OS
My machine came with Ubuntu 8.04 installed. I formatted the HD, but I still retain a recovery disc and can download a newer version for free if I ever intend to return to it. From the few hours I spent playing with it: it’s usable, but not enough bells and whistles for my taste.
The first thing I did was test Ray Ozzie’s promise that Windows 7 runs well on a netbook. I slapped the latest build I could find of the 7 beta (it was 7057 at the time, I since upgraded to 7068). The installation was remarkably easy – much easier than all the online guides described (i.e. this or this).
Here’s the list of steps I took to install Windows 7 on my Dell Mini:
- Start by formatting a USB drive to FAT32. The key here is to do this on a Vista machine (which I have installed on my main laptop), or on another 7 installation. This promises that the USB drive will be bootable. Copy the contents of the ISO DVD to the formatted drive (easiest way I know is to open the ISO using WinRar and just drag the files out)
- Go into the BIOS settings (hold the ’0’ key while the machine is booting) and enable “USB BIOS legacy support” under the “Advanced” tab. This will allow you to boot from your USB drive. Don’t forget to come back here after the OS is installed and disable the option, or else you may suffer crashes on hibernation or sleep.
- Connect your USB to your machine. On the next reboot, hold the ‘2’ key and select to boot from the USB drive.
- Install the system. Be sure to remove the USB drive when the installer reboots the machine.
- [optional step] After 7 is up and running, install the drivers. While most standard Dell drivers would work, look at this list to get a better fit for some components. You can stick with Window’s recommendations, but may lose some functionality (like touchpad functions)
- [optional step] Run these tweaks to improve the SSD’s performance. As a rule, an SSD is amazingly fast on read operations, but much slower on write. And defragmenting it too often may damage it.
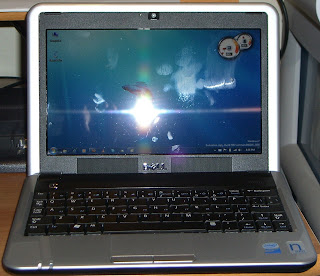
And there you go, a perfect Windows 7 installation (click any image to see a bigger version):
 It runs quite smoothly and leaves about half a gig free to run after the OS is up – just like Ray promised. It takes 25-40 minutes to install/re-install the OS. Upgrading 7 to a newer version works just as smoothly, but surprisingly takes a bit longer. The added benefit is that you do not need to re-install drivers or applications, as the installer is smart enough to upgrade just the right files.
The OS itself runs quite well, with Aero and Glass on. It chokes from time to time due to SSD write operations. I may turn off the paging file and see if that solves that problem. Here’s an image of the computer’s performance, driven down by the lackluster onboard graphics, and slow CPU:
 And so, despite purchasing the machine to be used specifically as the cheapest Mac available, I’m still running Windows 7. I can’t wait for that OS to come out – it’s amazing.
Accessories
I bought the following accessories to make my life easier:
- Neoprene sleeve to protect the laptop from scratches: $4.50

- Bluetooth dongle to allow me to use my BT mouse: $2.52
- 16GB SDHC card – I got the A-Data card for $27 and I manage all my multimedia files from it.

Hacks
I was surprised to hear Dell allows you to upgrade your machine and still keep your warranty (limited to memory and SSD). They actually published the service manual, explaining how to upgrade or change the bits and pieces.
I got a 2GB DDR2 SO-DIMM (200 pins) for $18 (you could probably get it for $10 today), followed the easy instructions and doubled my memory in 5 minutes.
 For $15 I got an Intel 4965 AGN wi-fi card off eBay, and upgraded my Mini to wireless-N (expect a future post discussing upgrading my router to wireless-N).
I hope to add a GPS to the main body in the future – I’m currently reviewing several hacks.
Final thoughts
Overall, I highly recommend the Dell Mini. It’s versatile, extensible, and useful. I love the form factor and the set of features. I use it on flights and whenever I don’t feel like schlepping my T400. It might be slow for some applications and definitely doesn’t deal well with complex 3D graphics, but this is not its purpose. For light writing, browsing, emailing and development (I installed Visual C# express on it) – it’s great. And the price is right.
 Last year I wrote about Avis's fuel charge (reminder: you pay $10 even if you return the gas tank full, if you drove less than 100 miles). Well, I just talk - some people do.
I work in the class action department at Dworken and Bernstein, L.P.A., in Cleveland, Ohio. We monitor consumer fraud across the country and have seen more and more companies acting in manners we believe to be unlawful. Recently, we have become concerned with “fuel service” charges from rental car companies.


